

Linux: How to Update Ubuntu Linux Server 14.04 LTS
In this Linux system administration tutorial you will learn how to update an Ubuntu Linux Server 14.04 LTS system with screenshots and instructions.
Prerequisites
To complete this tutorial you will require a running Ubuntu Linux Server 14.04 LTS (Trusty Tahr) system and an account with sudo administrative privileges. The system must have network connectivity and access to an Ubuntu update server.
Updating
The following steps will guide you through updating an Ubuntu Linux Server 14.04 LTS system. The update process can take some time to complete and some steps may take longer than others.
-
To begin updating your Ubuntu Linux System, you will need to be logged in using a valid user account for your system. If you are unsure of how to do this, read our tutorial on Logging into Ubuntu Linux Server 14.04 LTS.
In this tutorial, we have logged in as techonthenet on the host called ubuntu.
-
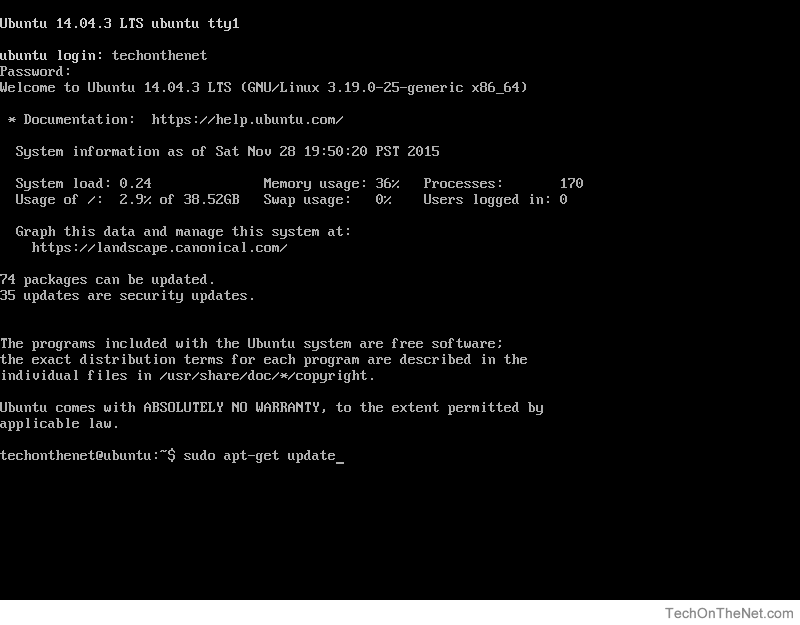
To update the software on our system we must first ensure we have the latest package lists.
To do this enter the command sudo apt-get update after the system prompt.
The following screenshot demonstrates what you will see.
Here is a break down of this command:
- sudo
- Execute the command that follows using super user permissions. (The user executing the sudo command MUST have privileges to do so.)
- apt-get update
- Execute the apt-get command with the update directive. The update directive tells apt-get to refresh the system package lists.
When you have entered the command, press the Enter key to execute the command.
-
The sudo command will now prompt you to enter the password for your user account before attempting to execute apt-get update with super user permissions.
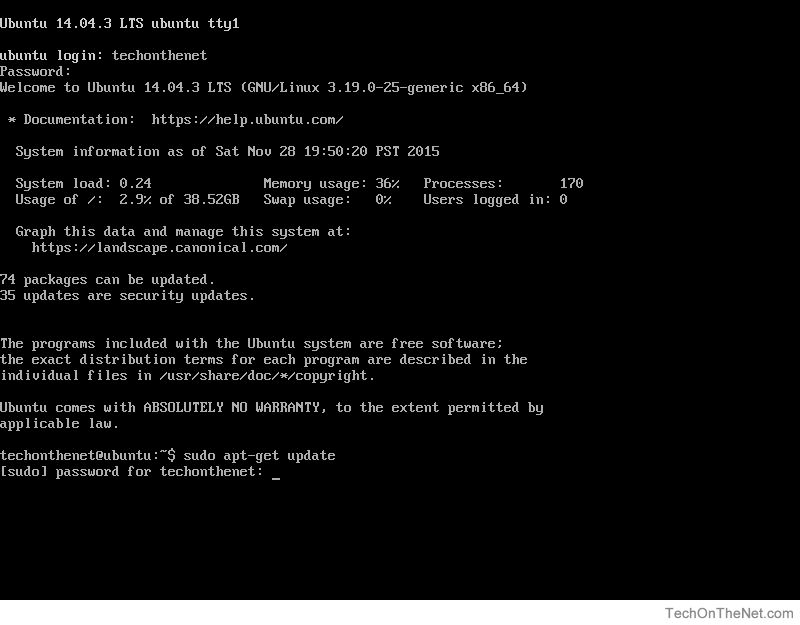
After you have entered your password, press the Enter key to continue.
-
If all goes well, you will see apt-get update begin to update its package lists. The apt-get update command outputs a great deal of information and can take some time to complete.
The following screenshot shows some of what you might see.
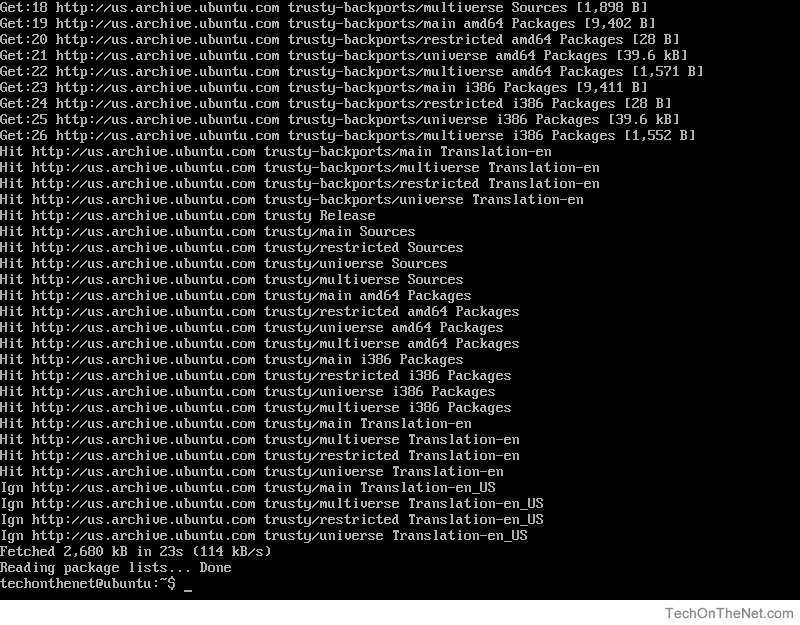
When apt-get update is complete you will again see the system prompt appear.
-
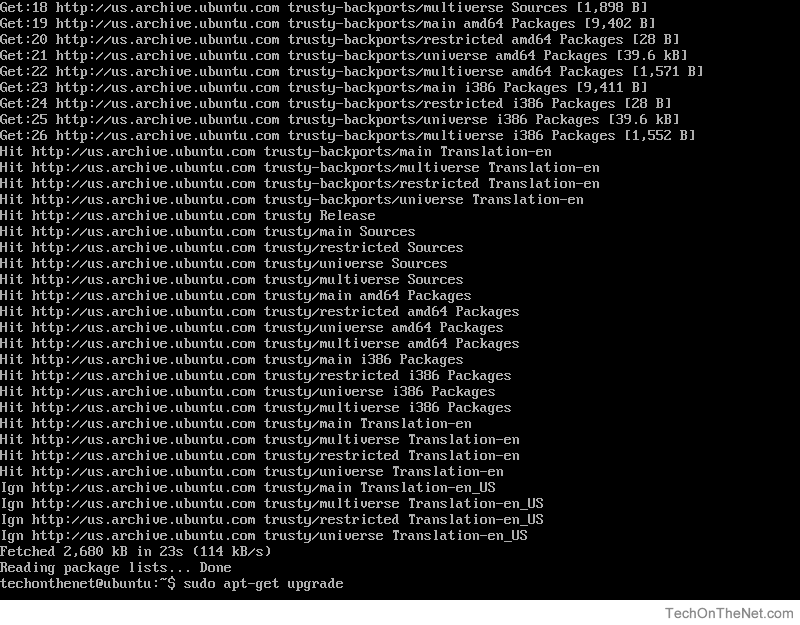
Next we will upgrade the software on our system by entering the command sudo apt-get upgrade at the system prompt.
The following screenshot demonstrates what you will see.
Here is a break down of this command:
- sudo
- Execute the command that follows using super user permissions. (The user executing the sudo command MUST have privileges to do so.)
- apt-get upgrade
- Execute the apt-get command with the upgrade directive. The upgrade directive tells apt-get to download and apply package updates that are available for your system. apt-get determines which packages have updates by checking the system package lists against the versions of the software packages that are currently installed on your system. If there are newer versions of software in the system package lists they will be marked for update.
If more than 15 minutes has passed since you executed the sudo apt-get update command from the previous steps, sudo will re-ask you to enter your account password.
-
The apt-get upgrade command will now determine which packages require updating. If new packages are available, it will display something like the following screenshot:
Please note that your package list will likely differ from what is seen here.
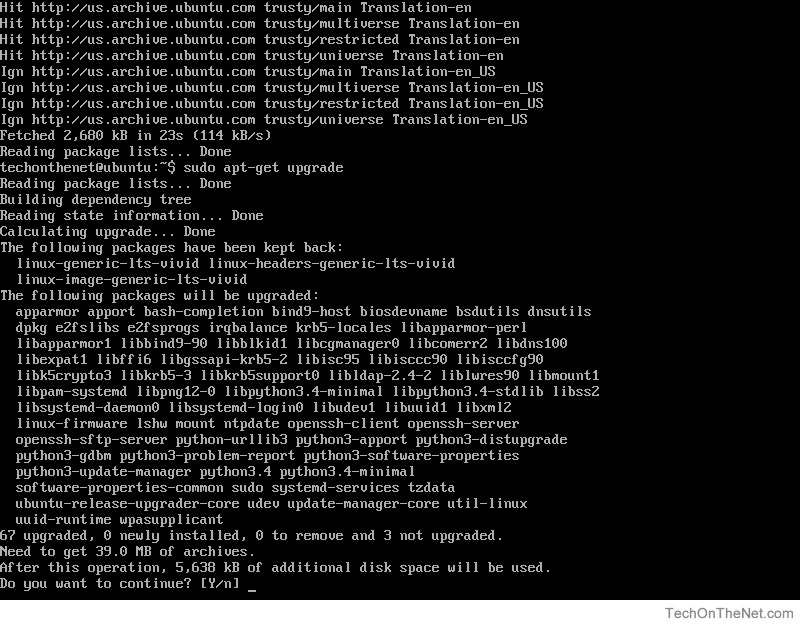
The apt-get upgrade command will prompt you to answer Y to proceed with the upgrade, or N to abort. (Case does not matter)
-
We will enter Y to tell apt-get upgrade to proceed and press the Enter key.

Note that Y is the default so pressing the Enter key without entering Y will result in the system completing the updates.
-
The apt-get upgrade command will now begin downloading and updating your software packages.
This can take some time so please be patient. You will see output from apt-get upgrade similar to the following:
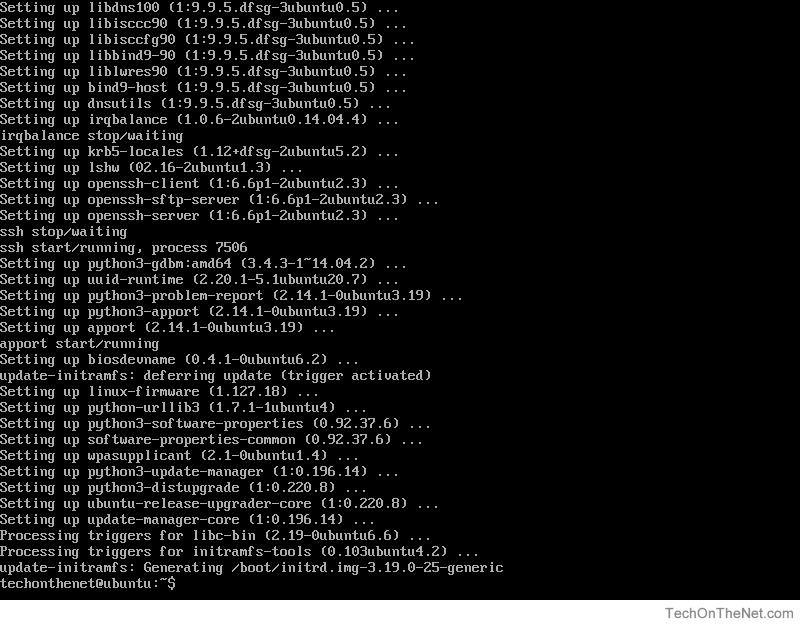
When apt-get upgrade is complete you will again see the system prompt appear.
-
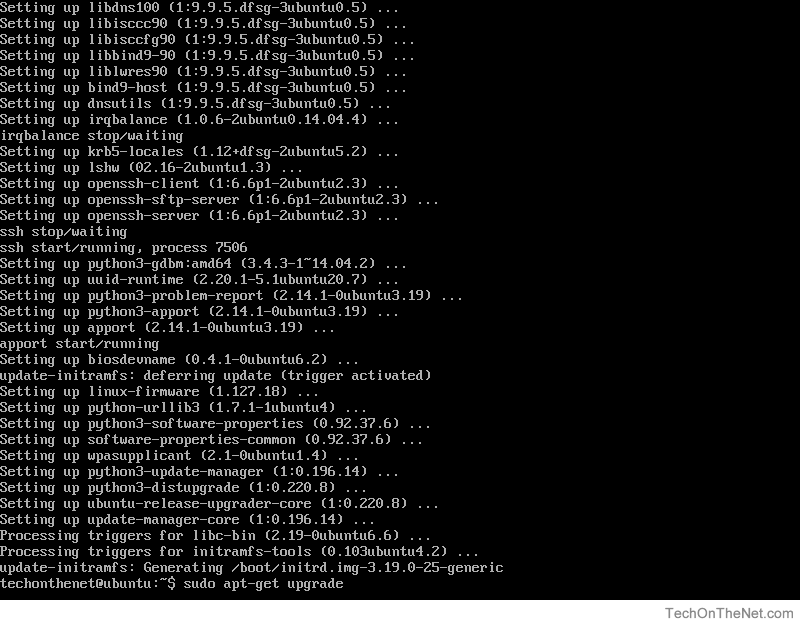
Some software packages require special attention to update and will not have been updated by the apt-get upgrade command.
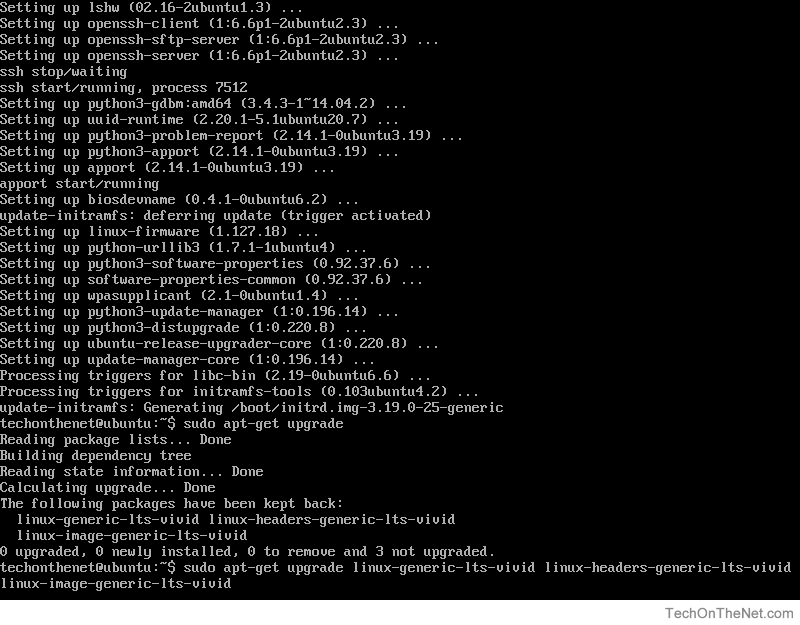
We can check to see if there are still packages that can be upgraded by re-entering the sudo apt-get upgrade command and then pressing the Enter key to execute the command.
-
The apt-get upgrade command will now re-check for packages that can be upgraded.
If there are packages that have not been upgraded, they will appear in the output of the apt-get upgrade command. In this example, we see that the following packages have been kept back.
linux-generic-lts-vivid linux-headers-generic-lts-vivid
linux-image-generic-lts-vivid
IMPORTANT: Packages that have been kept back may contain software updates that could cause unexpected behavior on your system. Please be sure that your system will not be affected by installing these packages before proceeding.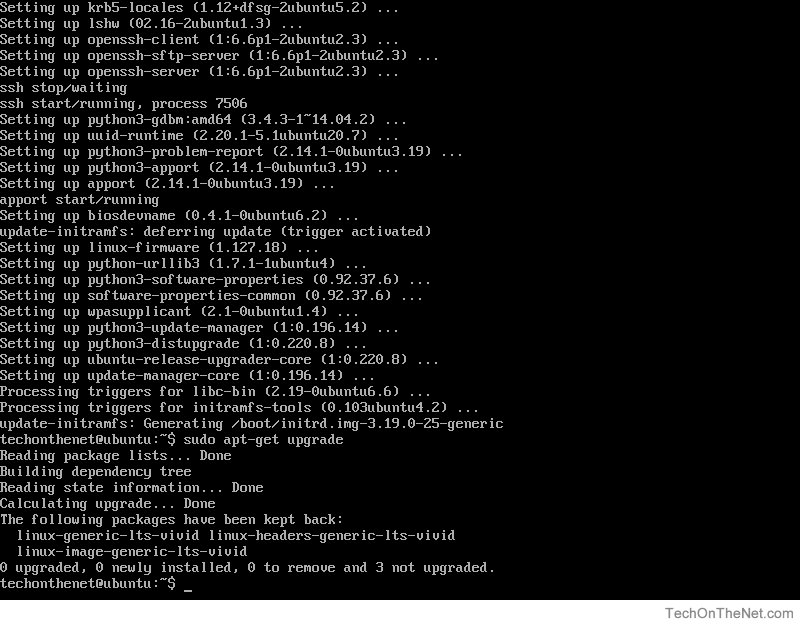
In our example, the packages that have been kept back contain an updated Linux kernel which we would like to apply.
-
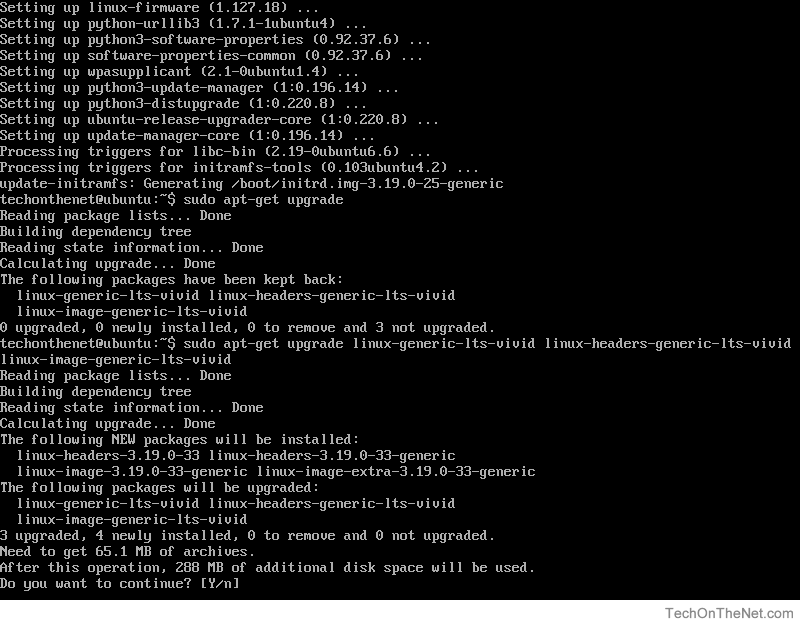
To update packages that have been kept back you will need to enter the sudo apt-get upgrade command with a list of the specific packages you would like to upgrade.
In this example, we will enter the following command:
sudo apt-get upgrade linux-generic-lts-vivid linux-headers-generic-lts-vivid linux-image-generic-lts-vivid
TIP: By providing the specific packages to apt-get upgrade we are indicating that we are okay with their installation.The following screenshot demonstrates the full command we entered:
After you have entered the command, press the Enter key to install the software packages.
-
The apt-get upgrade command will now prompt you to confirm that you would like to update the packages.
Entering a Y will tell the system to update the packages to the new version. Entering N here will abort the installation.
-
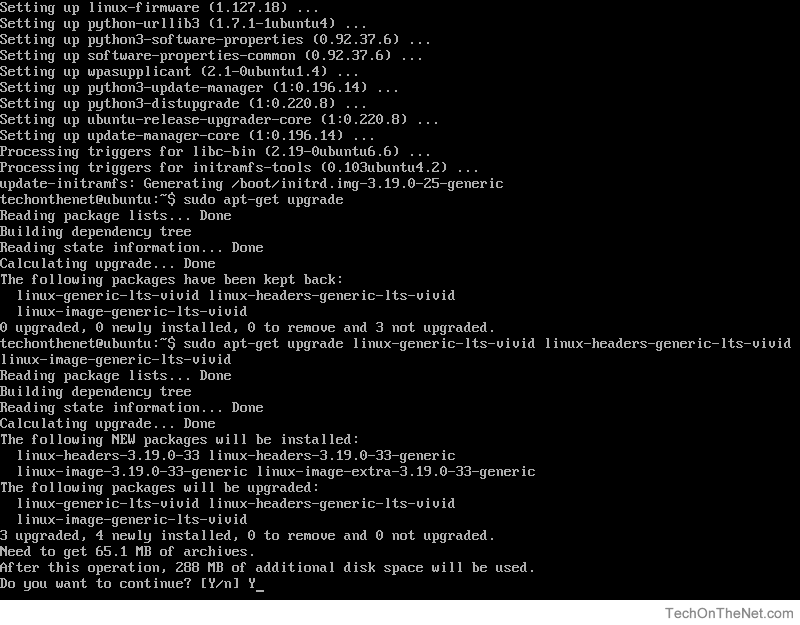
We will enter Y and press the Enter key to tell the system that we want to update these packages.
-
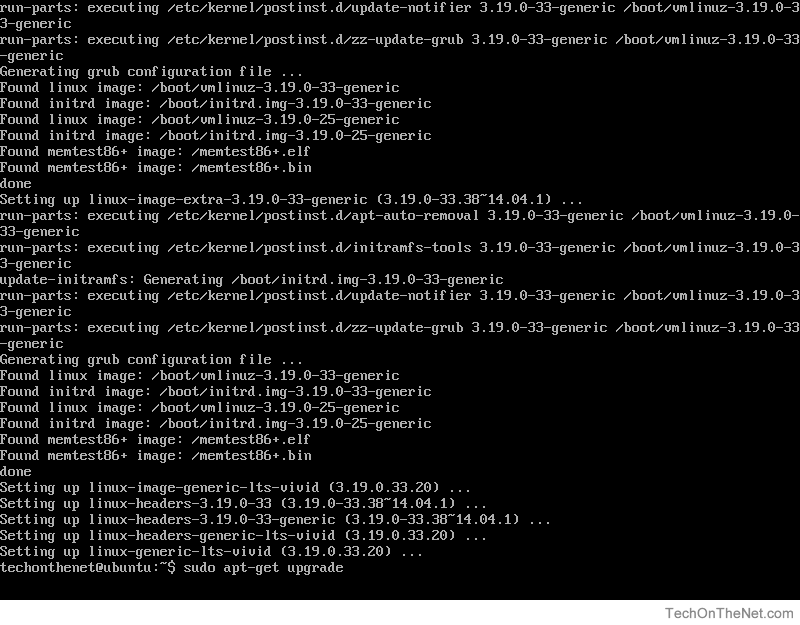
The apt-get upgrade command will now download and install the new software packages. This process may take some time to complete so please be patient.
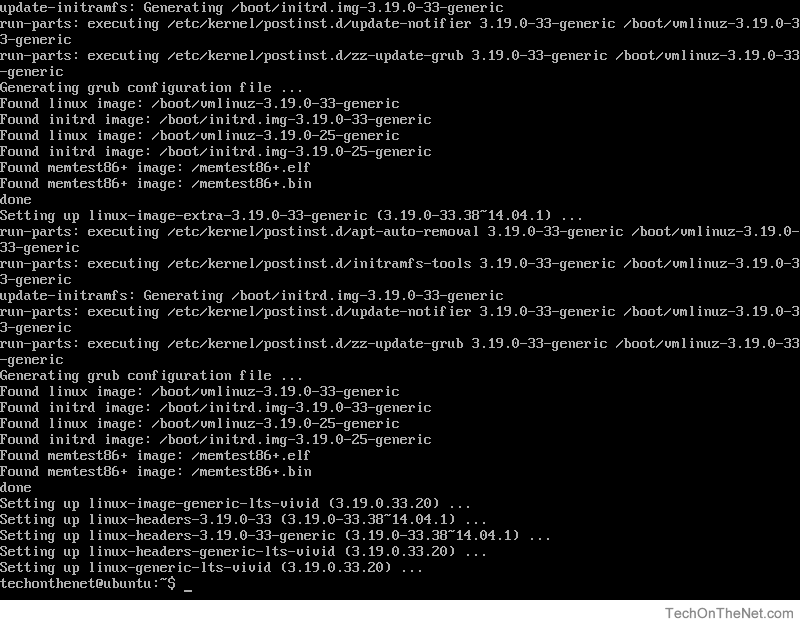
Once the apt-get upgrade has completed the software update, you will again be presented with the system prompt.
-
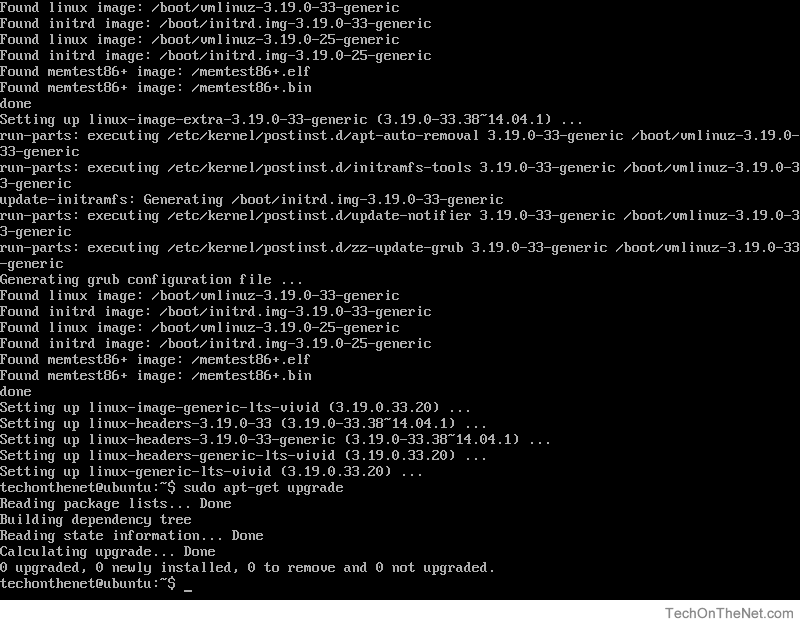
To ensure there are no more packages available for update, we will re-issue the sudo apt-get upgrade command and press the Enter key to continue.
-
The following line in the screenshot below indicates that there are no more packages available to update.
0 upgraded, 0 newly installed, 0 to remove and 0 not upgraded.
-
In some instances, such as when an update to the Linux kernel is done, you will need to reboot your system to ensure you are using the latest version of your software.
To reboot your system, enter sudo reboot at the system prompt and press the Enter key to execute the command.
IMPORTANT: Please be sure that it is appropriate to reboot your system before executing the sudo reboot command! There may be active users or services running on the system that should not be interrupted.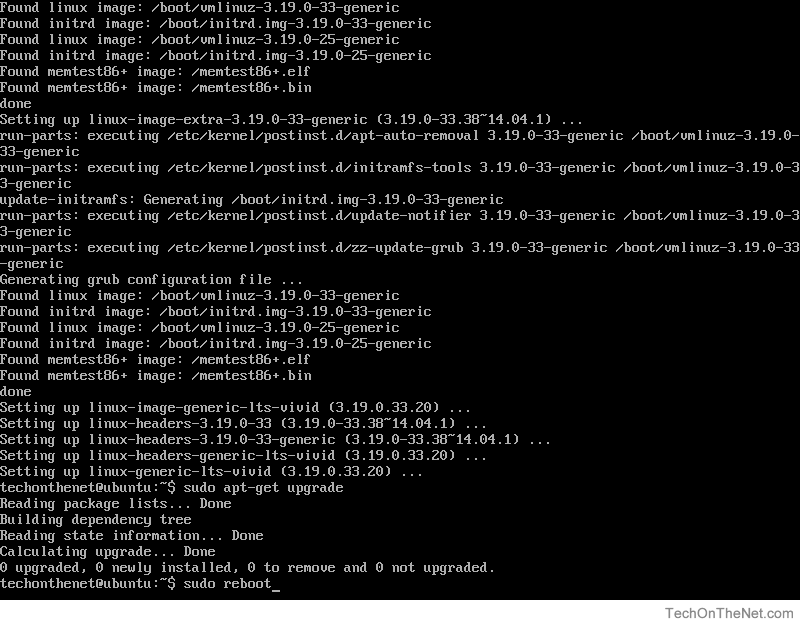
Congratulations, you have successfully updated your Ubuntu Linux Server 14.04 LTS system!
Advertisements