MS Excel 2016: Add a Named Range
This Excel tutorial explains how to define a named range in Excel 2016 (with screenshots and step-by-step instructions).
See solution in other versions of Excel:
If you want to follow along with this tutorial, download the example spreadsheet.
Question: In Microsoft Excel 2016, how do I set up a named range so that I can use it in a formula?
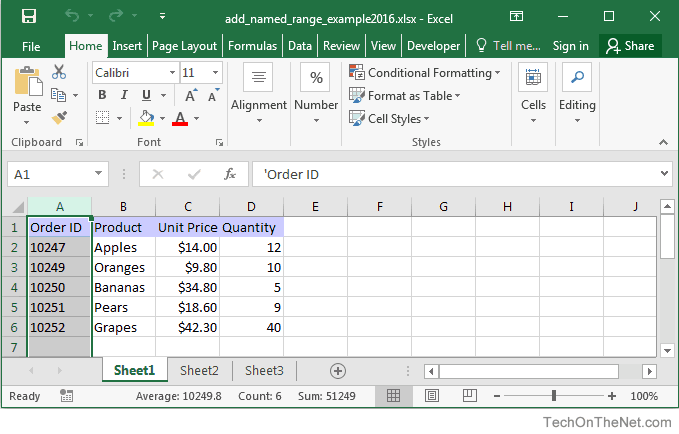
Answer: A named range is a descriptive name for a collection of cells or range in a worksheet. To add a named range, select the range of cells that you wish to name. In this example, we've selected all cells in column A.

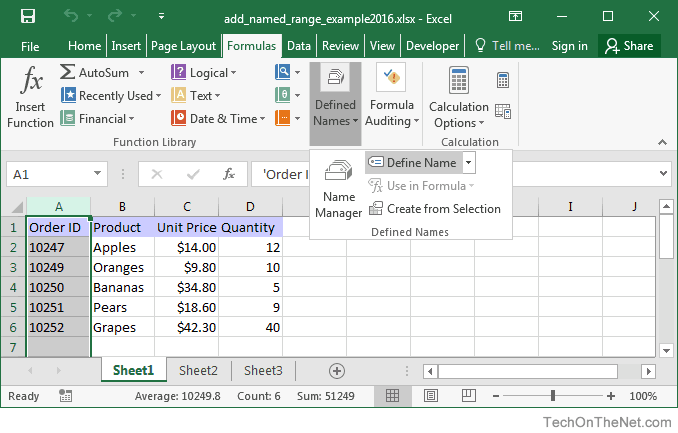
Then select the Formulas tab in the toolbar at the top of the screen and click on the Define Name button in the Defined Names group.

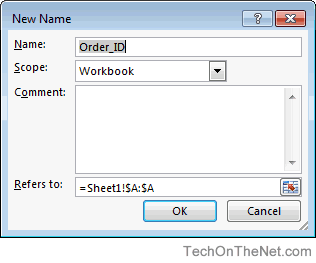
When the New Name window appears, enter a descriptive name for the range. The name can be up to 255 characters in length. In this example, we've entered Order_ID as the name for the range.
Then in the "Refers to" box, enter the range of cells that the name applies to. In this example, the range is automatically set to =Sheet1!$A:$A because this is the range of cells that we previously highlighted.
Then click on the OK button.

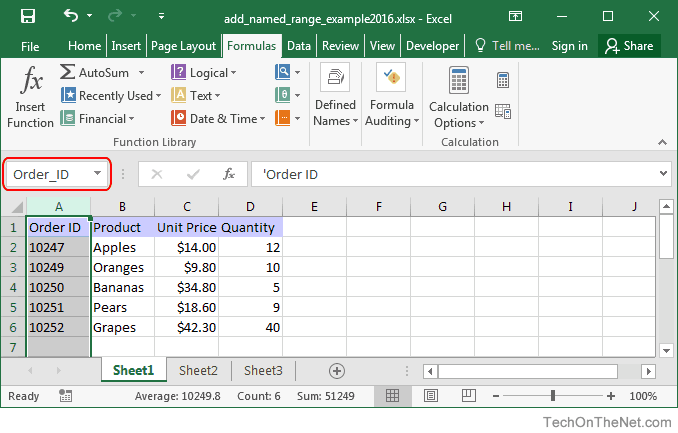
Now when you return to the spreadsheet, you will see the name Order_ID appear in the Name box (circled in red in the image below). The Name box can be found at the left end of the formula box. Now whenever you select column A, you will see this range name appear in the Name box.

Now that you have set up this named range, you can use Order_ID in formulas to refer to Column A in Sheet1.
For example:
=SUM(Order_ID)
Result: 51249
This SUM formula would add up all of the Order ID values in column A of Sheet1.
Advertisements


